Wonder Pump Assembly and Use Tips
Rim Guard demonstrates the use of the Wonder Pump model 30 A-Plus, a pump that the company has sold for over a decade. With 700 of these devices currently in the marketplace, they are “real workhorses…they keep on going no matter what.” In the video, we detail the assembly process, as well as the setup for the core ejector tool.
I’m Bob Koch with Rim Guard, and today we're gonna look at the Wonder Pump, the model 38 Plus. We've been selling this particular double diaphragm pneumatic pump for almost 10 years. We probably have about 700 of them out in the field and they're real workhorses. They keep on going no matter what. But sometimes when our customers receive the pump in the box, they have a little bit of a problem putting it together, so we're gonna try to clarify that a little bit by going through the assembly process today.
I've taken everything out of the box at this point. So I'm gonna turn the pump around the backside here. We're gonna get started with the two large quick disconnects that eventually will hook on to both the discharge hose and the intake hose. And they simply just screw in and I'm going to just finger tight these so I don't have to go through all the taping and everything. But you have the inlet and the outlet sides of the pump here. Then we've got the pressure gauge for vacuum that's going to go in right at this spot here. These are all of course you're gonna want to use a little bit of tape on each of these to make sure that everything is tight as it should be.
Then the handle, which is going to allow you to move the pump from forward discharge to reverse, goes on up here. Little screw that goes on the top, that also just gets tightened up as well.
We’ll move around to the front of the pump here. And first thing we’re going to do, I need to pull this little plug out here. This is where the air is going to go into the pump to run it. And there's a little bit of confusion that comes from this part here, which actually has two parts together and if you haven't figured out how to use that part yet, but the ball valve screws right into here. Then a little straight converter goes inside the ball valve. The regulator, you have that – there are arrows on the side here which show which way the air goes — You want the arrows pointing towards the pump. So that gets installed as well.
And the side of the regulator air filter, you need to use an Allen wrench to remove the little plug that's in here, and that's where the air pressure gauge gets installed.
On the outside of the pump, you're gonna need to purchase whatever type of air handling equipment you want. So this is just a typical quick disconnect air valve, which screws in the backside here. And again, everything needs to be put in with tape so that you get a good secure connection.
Last thing we're going to do on the backside of the pump is to install the muffler. Goes in the large hole in the body of the pump here. Now these quick disconnects are going to come apart and these are going to install on each of the intake and discharge hoses. So the shorter of the two hoses is the intake hose. And so one end of that is going to connect right to the quick disconnect on the pump and the other end is going to go towards your supply, your tank. And usually when we supply a tank, we have a fitting that goes right on there, a three quarter inch hose fitting. The other hose is the discharge hose. And there's two different ends here. One's a three quarter inch and one’s smaller here. The smaller end is what's going to connect to the core ejector tool. So again, we're going to just take off the quick disconnect here. This side, going to go on the larger of the threaded parts. The smaller end is going to be what's going to connect up to the core ejector tool. There's a third quick disconnect here we'll use, which is going to thread into the Y part of the core ejector tool. Quick disconnect goes on, and then this gets threaded onto the smaller of the ends on the discharge hose. And that just about does it.
Thought we'd go into a little bit of detail with regard to the core ejector tool. If this is your first time filling tires or if you’re not familiar with this particular brand of core ejector tool. I thought I'd give some tips about how to set this up, and how it actually works in terms of extracting the core out of the valve stem and how you connect it.
So the kit comes with a couple of different sizes of attachments. For the two different typical sizes of valve stems, you've got a large bore, like this one here, or standard bore like this one here and both of them have Schrader valves inside of the valve stem itself.
So the first thing you do is you need to take off the end unit of the core ejector tool. And in this case, we're going to work with the smaller regular size valve stem. So there are two different knurled pieces here. One has a larger gap to handle the large bore and one with a smaller gap to handle the standard size.
So I'm going to insert the standard size into the core ejector tool here and it just is a press fit into there, and then we'll put the cap back on there. And essentially the way this works is you have a plunger here which moves the actual extractor in and out. So in order to attach the core ejector tool to the standard sized valve stem, you need to put this last little bit of hardware on here that comes as part of the core ejector tool. And then we go ahead and we would attach this, normally this would be attached to the wheel of course, but in this case we'll just slowly attach this on to here. Make a good tight fit.
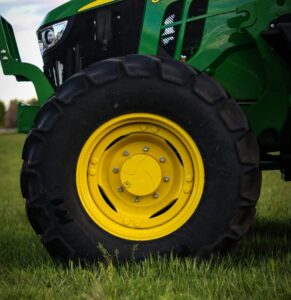
And the operation here is that we're trying to do is we're going to push the plunger in and rotate it until we get a connection with the Schrader valve inside of there. And once you do then you can unscrew the Schrader valve and then pull it back. And I'll show you how this works by extracting the valve stem out and now the core is gone out of there. So what that does is it opens up a pathway for the ballast to get into the tires.
So once that's extracted and back, you can start your filling process because the core is out of the valve stem and hidden back in this part of the body. When you're done filling, you basically just reverse that process, push the plunger up, put some pressure on it and start to screw the core back into the valve stem. When it's tight, and you pull the plunger out, and disconnect the core ejector tool from the valve stem, and now the Schrader valve is back in there. Same thing has happened for the large bore. You just need to change out the knurled part inside of the body here and that should do you good.
Well, we've covered how to set up the pump, how to put together the core ejector tool appropriately for the valve stem size that you're working with, but if you have any further questions, please give us a call at Rim Guard (866) 792-3700, and we'll be happy to answer any questions you have.
Helpful Resources
from Rim Guard

Find A Dealer Near You
![]()
Stop corrosion before it starts. The Original Beet Juice Ballast offered by Rim Guard® is the safest, most cost-effective and heaviest non-corrosive ballast on the market.